vRealize Automation bulk update lease on Virtual Machines

I wrote a workflow that takes some inputs and uses an ODATA query to list all virtual machines where their lease is expiring within a certain time frame.

It uses the API to get all the virtual machines and then you can bulk update these lease days by changing the value for the numberOfDaysToAdd variable.

You will need to add the vCACCAFE:vCACHOST value for the host attribute and also make sure that the plugin user configure has the right privileges and entitlements.


var operationName = "Change Lease";
var numberOfDaysToAdd = 30;
var leaseEndDate = "2017-08-15T00:00:00.000Z";
var pageSizeLimit = "20"
var endpoint = "com.vmware.csp.core.cafe.catalog.api";
var restClient = host.createRestClient(endpoint);

var pages = parseJson(api());
System.log("Number of pages found from API query: " + pages.metadata.totalPages);

for (i=1; i-1 < pages.metadata.totalPages; i++){

var json = parseJson(api(i));
if (i >1) {
System.log("Processing page " + i + " of pages." + metadata.totalPages + " . Sleeping for 60 seconds whilst vRA processes change lease operations.");
System.sleep(60000);
}

for each (deployment in json.content){
System.log("Found Deployment: " + deployment.name);
var catalogResource = vCACCAFEEntitiesFinder.findCatalogResources(host , deployment.name)[0];

System.log("Found catalog Resource " + catalogResource.name);

var newLeaseDate = new Date();
newLeaseDate.setDate(newLeaseDate.getDate() + numberOfDaysToAdd);

System.log("Setting new lease date to " + newLeaseDate);

var myvCACCAFEDateTimeLiteral = new vCACCAFEDateTimeLiteral(newLeaseDate) ;

//Get all the operations that are available on the deployment
var operations = catalogResource.getOperations();
var resourceActionNotFound = false;

//Locate the deployment specific operations and store it
for each (operation in operations){
System.log(workflow.currentWorkflow.name + ": " + operation.getName() + " operation is available on this catalog resource")
if (operation.getName().toLowerCase() == operationName.toLowerCase()){
System.log(workflow.currentWorkflow.name + ": " + operation.getName() + " operation identified and selected");
resourceActionNotFound = true;
break;
}
}
if (resourceActionNotFound == false) {continue};

var inputs = new Properties();
inputs.put("provider-ExpirationDate", myvCACCAFEDateTimeLiteral);

System.getModule("com.vmware.library.vcaccafe.request").requestResourceAction(operation,inputs)

}
}

function api(page){

var url = "consumer/resources?&limit=" + pageSizeLimit;
if (page) url = url + "&page=" + page.toString();
var catItemsUrl = url + "&$filter=resourceType/id eq 'composition.resource.type.deployment' and lease/end lt '" + leaseEndDate + "'";
var catItems = restClient.get(catItemsUrl);
return catItems.getBodyAsString();

}

function parseJson(res){

return JSON.parse(res.replace(/\\/g, '').replace(/\\t/g, '').replace(/\\r/g, '').replace(/\\n/g, ''));
}

vRealize Automation & Orchestrator – Updating blueprints deployment values using the Orchestrator createRestClient() method

I’ve been using the createRestClient() for a number of use cases recently and today I had to bulk update all the vRealize Automation composite blueprint deployment values along with each components maximum cluster values.

Here is my code I used:


//Set inputs
var componentMaxValue = 1;
var deploymentNumberOfInstances= 10;

// create rest endpoint for rest client
var endpoint = "com.vmware.csp.component.cafe.composition.api";
var restClient = vcacCafeHost.createRestClient(endpoint);
var blueprintsUrl = "blueprints";

// get blueprints
var blueprints = restClient.get(blueprintsUrl);
var res = blueprints.getBodyAsString();

//clean json and parse
var json = JSON.parse(res.replace(/\\/g, '').replace('\t','').replace('\r','').replace('\n',''));

// get all blueprints - match on name
for each (var blueprint in json.content){

System.log("Blueprint name: " + blueprint.name);
var blueprintsUrl = "blueprints/" + blueprint.id;
System.log("URL for blueprint " + blueprintsUrl);

// get blueprint test
var blueprints = restClient.get(blueprintsUrl);
var res = blueprints.getBodyAsString();

try {
//clean json and parse
var json = JSON.parse(res.replace(/\\/g, '').replace('\t','').replace('\r','').replace('\n',''));
}
catch(e){
System.log(e + ": Could not parse JSON payload for " + blueprint.name);
continue;
};

// gets all components.
for (var component in json.components){
if (json.components[component].data._cluster){
System.log("Found component " + component);
System.log("Current min value configured for component " + json.components[component].data._cluster.facets.minValue.value.value);

delete json.components[component].data._cluster.facets.maxValue.value.value;
json.components[component].data._cluster.facets.maxValue.value.value = componentMaxValue;
};
};
if (json.properties._number_of_instances){

System.log("Current number of instances value configured for blueprint " + json.properties._number_of_instances.facets.maxValue.value.value);
delete json.properties._number_of_instances.facets.maxValue.value.value;
json.properties._number_of_instances.facets.maxValue.value.value = deploymentNumberOfInstances;

};
json = JSON.stringify(json);
restClient.put(blueprintsUrl, json);
};

A couple of key things to point out.

var endpoint = "com.vmware.csp.component.cafe.composition.api";
var restClient = vcacCafeHost.createRestClient(endpoint);

This sets the API endpoint to use when creating the vCACCAFE REST Client method.

Once you have the REST client created, you then need to append the various URLs when calling a REST operation using the client. Fro example, to get all the blueprints, would would need to append this:

var blueprintsUrl = "blueprints";

Simply, this creates the complete REST URL to get all blueprints.

Once we get the JSON response, then we can loop through all the blueprints and start appending to the UR, which is this bit of code:

for each (var blueprint in json.content){

    System.log("Blueprint name: " + blueprint.name);
    var blueprintsUrl = "blueprints/" + blueprint.id;

}

You need to use the ID of each blueprint as the ID doesn’t allow any special characters and is set when you create the blueprint.

Once you have the JSON payload for your blueprints, you can loop through and get / set the various values you want, but you will need to loop through you components in order to find the virtual machines that are within your CBP. This is the code that sorts that out:

for (var component in json.components){

        if (json.components[component].data._cluster){
            System.log("Found component " + component);
            System.log("Current min value configured for component " + json.components[component].data._cluster.facets.minValue.value.value);
        }
}

You can match on a particular name here but I am just setting defaults for all my blueprints by firstly deleted the JSON object for the maxValue and then adding a new value:

delete json.components[component].data._cluster.facets.maxValue.value.value;
json.components[component].data._cluster.facets.maxValue.value.value = componentMaxValue;

Notice my inputs are at the top of the script and these could be input parameters in you vRO workflow.

Then once you have set your JSON payload for each blueprint, just do a put and update the CBP using this bit of code:

json = JSON.stringify(json);
restClient.put(blueprintsUrl, json);

You will notice the blueprintsUrl is set for each composite blueprint and therefore your JSON payload is updating specific values for each of your blueprints.

I’ll keep saying that the vRA REST API has come a long way and once you get your feet wet, you can quickly start deploying, managing and configuring resources within your environment.

Remember to set the vcacCafeHost attribute to your CAFE host configured using a user that has the right privileges to update your CBP’s.

vRealize Automation & Orchestrator – Delete a Business Group via VRO using the vRA API

I’ve just written a good example of how to use the restClient() method. The code snippet takes in 3 parameters, 2 inputs and 1 attribute.

Inputs are :

businessGroupToDelete – name of business group
tenant – name of tenant

Attribute:

vcacCafeHost (typeof vCACCAFE:VCACHost) with a value set to the vCAC CAFE host.

I’ve used the vCACCAFEEntitiesFinder to match on the business group name and this is case insensitive. So if the business group name is Corp, input could be CoRp and we get the right case to pass in the API filter, which quickens up the API search.

Then I use a filter in the API call using the BG name returned by the vCACCAFEEntitiesFinder.

I’m really liking using the method for the API and have done more and more coding like this. The vRealize 7 API is well documented and easy to use.


// Getting case of business group name, incase BG passed in is wrong case.
var entity = vCACCAFEEntitiesFinder.findBusinessGroups(vcacCafeHost , businessGroupToDelete)
if (!entity){throw "Could not find business group"};

for each (var bg in entity){

if (bg.tenantId.toLowerCase() == tenant.toLowerCase()){
System.log("Found the following business group: " + bg.name + " in " + bg.tenantId);
break;
}
}
if (!bg){throw "Could not find business group"};

// create rest endpoint for rest client
var endpoint = 'com.vmware.csp.core.cafe.identity.api';
var restClient = vcacCafeHost.createRestClient(endpoint);
var businessGroupUrl = "tenants/" + bg.tenantId + "/subtenants?filter=name eq '" + bg.name + "'";

// get business groups
var businessGroups = restClient.get(businessGroupUrl);
var res = businessGroups.getBodyAsString();

//clean json and parse
var json = JSON.parse(res.replace(/\\/g, ''));

for each (var v in json.content){

System.log("Business Group name: " + v.name + " and ID: " + v.id);

// match and delete business group by name
try{
if (v.name == bg.name) {

var businessGroupUrl = "tenants/" + bg.tenantId + "/subtenants/" + v.id;
System.log("Deleting business group: " + bg.name + " with the follow REST URL: " + businessGroupUrl);
restClient.delete(businessGroupUrl);
System.log("Deleted business group successfully");
break;
}
}
catch(e){
System.log(e);
break;
}
}

//System.debug(JSON.stringify(json));

vRealize Automation & Orchestrator API ODATA Filters

This is following on from my recent http://virtualdevops.com/2017/03/22/using-createrestclient-in-vrealize-orchestrator-to-create-vrealize-automation-rest-calls/ blog as I often hear people are confused about ODATA filters and specifically, what filters are available to use in both Orchestrator and the vRealize Automation API

ODATA is a common feature used in API calls to apply filter queries to obtain a subset of information based on the query passed in to the REST API call. ODATA filters can be used in both vRA REST calls and vRO workflows. This blog explores a couple of different ways to interact with the vRA REST API and vRO workflows to help minimize the data set returned in the response. Before we look in more detail on how to construct these API calls, lets go through some basic ODATA expressions:

Select a range of values

filter=Entry_No gt 610 and Entry_No lt 615

And

filter=Country_Region_Code eq 'ES' and Payment_Terms_Code eq '14 DAYS'

Or

filter= Country_Region_Code eq 'ES' or Country_Region_Code eq 'US'

Less than

filter=Entry_No lt 610

endswith

filter=endswith(VAT_Bus_Posting_Group,'RT')

startswith

filter=startswith(Name, 'S')

These are some of the most common parameters used, but it doesn’t stop there.

Additionally, it is import to append the pagesize and limit to you ODATA filter to limit the dataset returned.

&page=1&limit=50

The page size is important when expecting a large dataset response. Without providing a pagesize or a limit size, the defaults will be used, which might mean the dataset does not include the information you are expecting.

It is also worth noting that the filter expressions are discussed in the API docs found on the vRealize Automation 7.1+ appliance. To access the docs, goto the following URL on a vRealize Automation 7.1+ appliance

https://{{vra-fqdn}}/component-registry/services/docs

With the above information in mind, let’s start looking at some basic ODATA filter expressions that can be used.

I am using POSTMAN as a REST client to interact with the vRA API.

Take this URI example:

https://vra-01.mylab.com/catalog-service/api/consumer/resources/

I only have a few catalog resources but see the following response:

"metadata": {
    "size": 20,
    "totalElements": 29",
    "totalPages": 2,
    "number": 2,
    "offset": 20
}

This shows that there is a total of 29 elements in the response, 2 pages and a size of 20. This means that the JSON response has 2 pages and the 1st page list the first 20 elements. You would need to go to page 2 to get the other 9 elements. If using POSTMAN, you can see the HREF element that shows you what pagesize and limit defaults are being used.

“href”: https://vra-01.mylab.com/catalog-service/api/consumer/resources/?page=2&limit=20

By changing the pagesize and limit, you can control how many elements are returned, or you can search through each page to find the element that you want.

To limit the response to 40 items instead of the default 20 in this case

https://vra-01.mylab.com/catalog-service/api/consumer/resources/?limit=40

or to get to page 2,

https://vra-01.mylab.com/catalog-service/api/consumer/resources/?page=2

However, even though it is important to understand the pagesize and limit used, it is not an efficient way to query resources using the API.  Many times, the query is set with a large limit and a pagesize of 1 to accommodate all resources, but it’s not an efficient way to find resources. What happens if you have 000’s of resources or you have more resources than what your limit is set to? Here is where you can use ODATA filters and use filter expressions to minimize the result set.

So how do we do this? One way is to read the API docs that come with vRealize Automation and it is important to read through how ODATA filters work.

A very simple example is to add a query expression that targets a particular name or ID. For example:

https://vra-01.mylab.com/catalog-service/api/consumer/resources/?
$filter=id eq '21da4606-ebfa-440e-9945-6ef9102c6292'

If you look at the metadata, you can see we have only one element returned:

"metadata": {

    "size": 20,
    "totalElements": 1,
    "totalPages": 1,
    "number": 1,
    "offset": 0

  }

This is indeed the element that has the ID equal to 21da4606-ebfa-440e-9945-6ef9102c6292.

Just breaking down the filter expression, here is how it worked:

$filter=id eq '21da4606-ebfa-440e-9945-6ef9102c6292'

The $filter is used and is set to equal an expression. In this case id eq ”

You can append the pagesize and limit with a filter. For example:

?page=1&limit=1&$filter=id eq ''

Notice the ? used to append a query to the URI, the & sign to have multiple filters and the $filter value which is the beginning of the ODATA filter query.

We can do additional searches too.

https://vra-01.mylab.com /catalog-service/api/consumer/resources/
?$filter=id eq '21da4606-ebfa-440e-9945-6ef9102c6292' 
or id eq 'f89877f9-7c86-43e1-9956-9cefe22f127e'

Just checking the metadata, we can see the following

  "metadata": {

    "size": 20,
    "totalElements": 2,
    "totalPages": 1,
    "number": 1,
    "offset": 0

  }

That matches our query as we see 2 elements returned.

If we supply an invalid ID, it simply doesn’t return an element.

This is all straight forward so far, so how do we do more complex ODATA filters? Well, there are a couple of ways to see how filters are used within vRealize Automation that will help you understand how to append ODATA filters to your API calls.

The first way is to look at the access_lot.txt log file that resides in /var/log/vcac/. This log file shows you all the API calls that are being made either by an end user or the vRealize Automation system. Looking at this log file can help you understand more complex ODATA filters.

You can simply use the UI and execute a search, which logs the ODATA filter used in the UI when searching in the access_log.txt  . A good example of this is searching for catalogue items as we have a nice advanced search box that we can use to trigger a ODATA search.

Screen Shot 2017-04-09 at 19.21.30

Searching the access_log.txt log file, I can see the following API call which show how the search made via UI translates in to a more complex ODATA query.

/catalog-service/api/catalogItems/?$top=30&$skip=0&$orderby=name%20
asc&$filter=substringof%28%27docker%20-%20coreos%27%2Ctolower%28
name%29%29%20and%20substringof%28%27sample%27%2Ctolower%28
description%29%29%20and%20outputResourceType%2Fid%20eq%20%27
composition.resource.type.deployment%27%20and%20providerBinding%2F
provider%2Fid%20eq%20%275a4f1ed5-7a6c-4000-8263-5cbbcc888e84%27%20
and%20status%20eq%20%27PUBLISHED%27%20and%20organization%2F
tenant%20ne%20null

The URL has been encoded but we can simply decode this using an online decoder to give you the format that you require:

/catalog-service/api/catalogItems/?$top=30&$skip=0&$orderby=name 
asc&$filter=substringof('docker - coreos',tolower(name)) and 
substringof('sample',tolower(description)) and outputResourceType/id 
eq 'composition.resource.type.deployment' and 
providerBinding/provider/id eq '5a4f1ed5-7a6c-4000-8263-5cbbcc888e84'
and status eq 'PUBLISHED' and organization/tenant ne null

Some interesting filters have been used, specifically new filters we haven’t discussed, for example  substringof(‘docker – coreos’,tolower(name)).

Substringof returns name records for catalog items with names containing the string ‘docker – coreos’

We could also use this :

catalog-service/api/catalogItems/?$filter=startswith(name,'Docker')

This returns 2 results as expected, as we have 2 OOTB catalogue items that have a name that starts with Docker.

You can also do precedence grouping which enables you to override the precedence conventions to manipulate your dataset based on the precedence grouping defined.

catalog-service/api/catalogItems/?$filter=substringof
('docker - coreos',tolower(name)) and 
substringof('sample',tolower(description))

You can list all virtual machines that were created between 2 different dates:

/catalog-service/api/consumer/resources/?$filter=(dateCreated 
gt '2017-01-01T00:0:00' and dateCreated le ‘17-01-02T00:0:00')

This will display all virtual machine created between ‘2017-01-01T00:0:00’ and ‘2017-01-02T00:0:00’

You can actually append a filter to this precedence and say all virtual machine that are active.

/catalog-service/api/consumer/resources/?$filter=(dateCreated 
gt '2017-03-29T11:42:00' and dateCreated le '2017-03-29T11:50:00') 
and status eq 'ACTIVE'

To be safe, you could make the active status to uppercase, just to ensure any parameters programmatically set are capitalized

catalog-service/api/consumer/resources/?$filter=(dateCreated gt 
'2017-03-29T11:42:00' and dateCreated le '2017-03-29T11:50:00') 
and status eq toupper('active')

Additionally, you can use the orderby function to sort your queries too.

orderby=dateSubmitted+desc

But how do we know what parameters can be passed in using the ODATA filter?

Well, this is a bit of trial and error. You can use the JSON response elements and using the key element and see whether you get results you are expecting that means the expression is working successfully. So take this JSON response payload:

  {

      "@type": "CatalogResource",
      "id": "21da4606-ebfa-440e-9945-6ef9102c6292",
      "iconId": "cafe_default_icon_genericCatalogItem",
      "resourceTypeRef": {
        "id": "composition.resource.type.deployment",
        "label": "Deployment"
      },
      "name": "vm-app-01-88805337",
      "description": null,
      "status": "ACTIVE",
      "catalogItem": {
        "id": "8e04dceb-f040-4bbc-b312-8a1b0d0a3b95",
        "label": "VM app 01"
      },
      "requestId": "3f49e42a-5e4e-4293-b3f0-eff2a34a5108",
      "providerBinding": {
        "bindingId": "3ee7fe9f-197c-4fac-8e59-cea6ac4f2336",
        "providerRef": {
          "id": "5a4f1ed5-7a6c-4000-8263-5cbbcc888e84",
          "label": "Blueprint Service"
        }
      },
      "owners": [
        {
          "tenantName": "vsphere.local",
          "ref": "oleach@vmware.com",
          "type": "USER",
          "value": "Oliver Leach"
        }
      ],
      "organization": {
        "tenantRef": "vsphere.local",
        "tenantLabel": "vsphere.local",
        "subtenantRef": "8723d842-d6f0-48c0-b0a3-e555eaeecdd5",
        "subtenantLabel": "Corp"
      },
      "dateCreated": "2017-01-00T00:00:00.000Z",
      "lastUpdated": "2017-01-00T00:00:00.000Z",
      "hasLease": true,
      "lease": {
        "start": "2017-01-00T00:00:00.000Z"
      },
      "leaseForDisplay": null,
      "hasCosts": true,
      "totalCost": null,
      "hasChildren": false,
      "operations": null,
      "forms": {
        "catalogResourceInfoHidden": false,
        "details": {
          "type": "external",
          "formId": "composition.deployment.details"
        }
      },
      "resourceData": {
        "entries": []
      },
      "destroyDate": null,
      "pendingRequests": []
    },

We can test setting the expression filter to use any of the above JSON payload elements, although there are ones that won’t work and other caveats you need to follow.

For example, take the request ID. This should look like ?$filter=requestId, however that doesn’t work. Trial and error lead me to use ?$filter=request as shown here:

catalog-service/api/consumer/resources/?$filter=request 
eq '3f49e42a-5e4e-4293-b3f0-eff2a34a5108'

Additionally, in the vRA API docs, there are some caveats to be aware of. See this notes in the API docs.

Note: Notice how even though the providerRef object contains a label element, we use provider (and not providerRef) and name (and not label) to craft the filter:

$filter=provider/name eq 'theName'
      "providerBinding": {
        "bindingId": "cd1c0468-cc1a-404d-a2e0-a4e78fc06d4d",
        "providerRef": {
          "id": "2575e506-acfe-487a-b080-9898a30f519f",
          "label": "XaaS"
        }
      },

Therefore, in order to get all providers that are of type XaaS, we need to run the following ODATA filter

/catalog-service/api/consumer/resources/?$filter=
providerBinding/provider/name eq ‘XaaS’

Notice provider is missing the Ref and the label is now the name. However, you can just use id too, for example:

catalog-service/api/consumer/resources/?$filter=
providerBinding/provider/id eq 
'2575e506-acfe-487a-b080-9898a30f519f'

In order to get to an element that is an array, for example using the owner information in above JSON payload, you can simply do this:

catalog-service/api/consumer/resources?$filter=owners/ref 
eq 'oleach@vmware.com'

You can also use firebug or chrome dev tools to see what API calls are being made via the UI and intercept the API call and look at the filters being used. For example, let’s redo the search we did above to see catalogue item entitlements and sniff the request using the firebug add-on in Firefox.

Here you can see the output of firebug:

Screen Shot 2017-04-08 at 12.34.14

The request URL will give you the UTF-8 encoded format and you can see also the ODATA filters used.

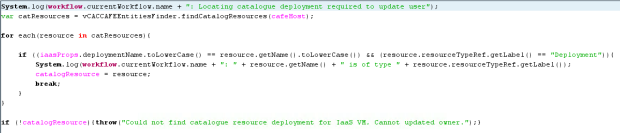
Additionally, you can also use ODATA filters in vRealize Orchestrator and these principles still apply.

Take this code example:

service = cafeHost.createCatalogClient().getCatalogConsumerResourceService();

var filter = new Array();

filter[0] = vCACCAFEFilterParam.substringOf("providerBinding/provider/id",
vCACCAFEFilterParam.string('2575e506-acfe-487a-b080-9898a30f519f'));
var query = vCACCAFEOdataQuery.query().addFilter(filter);
var odataRequest = new vCACCAFEPageOdataRequest(1, 10000, query);
resources = service.getResourcesList(odataRequest);

You can add you filter parameters in the same was as you can using the API ODATA filters.

To add additional parameters, you can build up the filter array with your queries.

Remember to consider the caveats I have been talking about above but by using the API JSON response, you can determine what filters to use. Please add comments if you find any caveats regarding ODATA filters not mentioned above.

Using createRestClient() in vRealize Orchestrator to create vRealize Automation REST calls.

There is a createRestClient() method available in the vRealize Automation 7.x plugin in vRealize Orchestrator that you can use to create REST calls. The difference with using this method over using a REST host created in vRealize Orchestrator is that you do not need to get a Bearer token as the createRestClient()  method uses the vCACCAFEHost object configured and therefore you use the authentication configured within the host object you have created.

Once you have set up a vCACCAFEHost object using the ‘Add a vRA host’ workflow, you can use REST calls very similarly to native REST but there are some slight nuances. However, understanding these nuances helps understand how to interact with the API in my opinion.

Here is a screen shot of the scripting class and the method I am referring to.

Screen Shot 2017-03-22 at 11.49.33

You can see the return type is a the vCACCAFERestClient object. Once you have created an instance of the vCACCAFERestClient object, you can start interacting with the API by using some of the methods shown below.

Screen Shot 2017-03-22 at 11.48.54

However, you need to add which API service you want to connect to when creating the clientRestHost() method as that method requires an input string.

To determine what endpoint you need to use, you canlook at the API docs for the vCACCAFE plugin and search for the vCACCAFEServicesEnum scripting class. Here is a screen shot of what endpoints are available:

Screen Shot 2017-07-07 at 08.46.42

Or, as the above doesn;t work :), you can find your endpoint by searching this REST query:


https:{fqdn}/component-registry/endpoints?limit=500&orderby="url"&$filter endpointType/protocal eq "REST"

Here you can see the endpoint I am using for the catalog service is com.vmware.csp.core.cafe.catalog.api

Here is the Orchestrator code that you can use now:

var endpoint = 'com.vmware.csp.core.cafe.catalog.api';
var restClient = host.createRestClient(endpoint);
var catItemsUrl = "consumer/resources";

Notice that I am passing in an additional consumer/resources URL. This is because once I have connected to the vRA API endpoint, I can then chose what URI to use depending what I am trying to query form the vRA API Endpoint. The URI is apended to the base URL determined from the vRA REST endpoint. This information is available in the online docs.

The other thing to note is that the return type from the REST call returns a vCACCAFEServiceResponse object. Have a look at that object in the API browser to see available methods and attributes.

So now I have my full URL, I can then make a REST call as follows:

var catItems = restClient.get(catItemsUrl);
var res = catItems.getBodyAsString();

TIP: I noticed that if I parsed the string output to a JSON object, it would fail as the vRA Host reference looks to be escaped. Therefore, before converting to a JSON object, you need to strip out any ‘\’ (forwardslashes) before parsing the string.

json = JSON.parse(res.replace(/\\/g, ''));

This now turns the REST response into a JSON ojbect that you can iterate through.

However, what happens if you have many catalog resources? You may hit a page size limit or the info you are bring back may take a long time to return. This is where you can use ODATA filters and pagesize parameters in your URL.

For example:

var catItemsUrl = "consumer/resources?limit=10$filter=catalogItem/name eq 'vRA IaaS'";

This dramatically cuts down the response time and saves resources.

Check the /var/log/vcac/access_log.txt for more info and look here at a snippet

27.0.0.1 [ +0000][51 ms] "GET /catalog-service/api/consumer/resources?
$filter=catalogItem/name%20eq%20'vRA%20IaaS'

27.0.0.1 [ +0000][406 ms] "GET /catalog-service/api/consumer/resources'

So nearly 800% faster and I only have a hand ful or catalog resources available in my lab. If you have 000’s, make sure you use filters. For more info on ODATA filters for the catalog-service, see this URL https://{vra-fqdn}/component-registry/services/docs

How to get vRealize Automation Install Wizard values

The vRealize Automation installation wizards is one of the best new features in version 7 but I was recently asked how to get the install wizard values post installation for vRealize Automation. This is useful to just help understand what values were entered in case you need to troubleshoot the install or double check the config.

I found one way of doing this which may or may not be the best way.

You can pass in a parameter to the vcac-config utility to get page data specified during the install.

Each installation wizard page has an ID value. You can find these by running this command:

cat /opt/vmware/share/htdocs/service/wizard/wizard.xml
| grep -i '<wizardPage' -A1 | grep -i -w ' id\b'

This will list all the page IDs in the install wizard.

 id="welcome"
 id="eula"
 id="distribution.select"
 id="host.init"
 id="va.init"
 id="role.config"
 id="host.vra"
 id="identity.main"
 id="host.iaas"
 id="db.mssql.config"
 id="iaas.servers.web"
 id="iaas.servers.manager"
 id="iaas.servers.dem"
 id="iaas.servers.agents"
 id="va.certificate"
 id="web.certificate"
 id="ms.certificate"
 id="loadbalancers"
 id="validate"
 id="snapshot"
 id="install"
 id="licensing.main"
 id="telemetry"
 id="finish"

Now you have the wizard page IDs, you can get the parameters you have entered on the install wizard by running this command:

 /usr/sbin/vcac-config install-wizard --page iaas.servers.dem --params-get

This will output something similar to this:

---BEGIN---
 {"DemName":"DEM","instance":"iaas-01.vra.com\\DEM","ServiceUser":"vra\\svc_vra","DemRole":"dem-worker","ServiceUserPassword":"passw0000rd!","DemDescription":"DEM"}
 ---END---

You can run this command and enter the page ID to get any of the install wizard data you entered, just in case you aren’t sure what was configured.

vRealize Automation – Changing a Virtual Machine’s Business Group in 7.2 and 6.x

Changing business groups in both vRealize Automation v6 and v7 is a common task and below demonstrates how to automate the process. Luckily, VMware provides an out of the box vRealize Orchestrator workflow solution in both vRealize 6.x and 7.2, however, the workflow you need to use in both versions is different. Let’s have a look:

vRealize Automation 7.2

As of v7.2, we have a new workflow that changes the business group of the IaaS virtual machine entity as well as the CAFE deployment entity. The virtual machine entity is still part of the IaaS model, however, the deployment is a CAFE entity and therefore there are a few things you need to be aware of before changing the business group. We’ll cover those later. However, here is a screenshot of the workflow that you need to use:

The workflow you need to run to change business group can be found in the following location, noting this is under the Library folder:

screen-shot-2017-01-28-at-16-55-52

You need to provide the following inputs:

Screen Shot 2017-01-28 at 16.56.39.png

There are a few things to be considered.

1 – The owner of the virtual machine must also be a member of the target business group. The business group is determined based on the reservation you select. If the user is not a member of the target business group, the virtual machine IaaS entity business group will get updated, however, the deployment CAFE entity business group entity will not get updated, leaving you in a position where the 2 entities that are out of sync. If this is the case, your my items will be out of sync as the deployment will still appear under the original business group but the virtual machine will appear under the new business group.

2 – You may have more than one Virtual Machine within the deployment so make sure you update all virtual machine entities within the deployment.

3 – This workflow is not available prior to version vRealize Automation 7.2, although if you need it, contact VMware GSS support as they may be able to help you get your hands on a fix. Or, better still upgrade to vRealize 7.2.

Based on the above, one way I would implement this solution would be to create a day 2 operation on the deployment CAFE entity. Then you can do a couple of things as follows:

1 – Check that the owner of the deployment is a member of the target business group. If not, flag this on the day 2 XaaS form.

2 – Get all virtual machines that are part of the deployment so you update all virtual machines which are part of the deployment.

That’s it but you can enhance the custom day 2 resource operation if you need to.

vRealize Automation 6.x

In my opinion, it is slightly easier to update the virtual machine business group as we don’t have to worry about the CAFE deployment as the entity doesn’t exist in vRA 6.x. We do have MMBP, but this is part of the IaaS model which can be updated. This post just concentrates on single machine blueprints. The workflow you need to run to change business groups can be found in the following location, noting this is under the Library folder:

Screen Shot 2017-01-28 at 17.12.29.png

You can just run the import vCAC Virtual Machine and you can rerun this over an over again. It won’t register the machine multiple times but just update the business group based on the following inputs:

screen-shot-2017-01-28-at-17-14-02

You can see there are few more options to supply in vRA 6.x. You can also make this a day 2 operation by wrapping this workflow around another workflow as you can see the actual code that changes the business group is this:

vm.register()

Where vm is a vCAC:VirtualMachine type. You can see this in the ‘start register workflow‘ scripting element.

You can see the requirements parameters using the API library, but here’s a screenshot of what you need:

screen-shot-2017-01-28-at-17-18-32

That’s pretty much it. Happy Business Group Automating.

vRealize Automation 7. How to get Deployment Name and Virtual machines from a deployment

In vRealize Automation 7, we have a deployment now that contains all the resources. This is different to how it worked previously. But how do we get information about the deployment, so in a case that we need to update the owner of a deployment if we have deployed a composite blueprint using XaaS?

Here is  snippet of code I use to determine what is what in the deployment.

screen-shot-2016-11-11-at-16-04-36

The key is once you have found the catalogue resource, this line determines whether it is the deployment or virtual machine.

var catResources = vCACCAFEEntitiesFinder.findCatalogResources(cafeHost);
var resourceName = "<deployment name>;
for each (resource in catReosurces){
    if (resource.resourceTypeRef.getLabel() == "Deployment")) +
    resource.getName() == resourceName;
        catalogResource = resource;
break;
}

The getLabel() tells you whether it is a virtual machine or whether its the deployment. Now , once you have the catalogue resource, you can get the deployment and execute a change owner on the deployment.

var operations = catalogResource.getOperations();
var operationName = 'Change Owner';

for each(op in operations){
    System.log(workflow.currentWorkflow.name + ": " + op.getName() +
    " operation is available on this catalog resource");
    if (op.getName() = operationName){
        System.log(workflow.currentWorkflow.name + ": " + op.getName() +
        " operation identified and selected");
        changeOwnerOperation = op;
        break;
    }
}

Now we have the operation of on the deployment, we can pass that in to the requestResourceAction in vRealize Orchestrator and submit the change owner process.

The inputs to the resource action requires the vCACCAFE:ConsumerResourceOperation and the payload for the new user. The payload is a property object. as follows:

ownerProperties = new Properties();
ownerProperties.put("provider-NewOwner", newOwner);

This helps go some way to changing the owner of a deployment. Great is you need to use XaaS to wrap deployments. In future releases, we won’t need to do this as we will have the ability to hide CBP from the catalogue. So we will be able to deploy a catalogue item using the correct owner but the owner won’t see the catalogue item as you can mark it hidden. Hence the logged in user won’t see the catalogue item, but still be entitled to request it.

vRealize Orchestrator – Working with XML and the NSX API

I’ve found that it’s a must to know how to work with XML in vRealize Orchestrator, especially when using the NSX API, and the good news is that it is very simple, once you know a few key commands.

First off, the XML plugin is based on E4X, so searching for help on this XML library is a good start.

Take this XML structure for example, which is for NSX load balance configuration that shows the configuration for pool members:

<loadBalancer>
  <pool>
    <poolId>pool-1</poolId>
    <name>pool-one</name>
    <algorithm>round-robin</algorithm>
    <transparent>false</transparent>
    <member>
      <memberId>member-1</memberId>
      <ipAddress>192.168.0.1</ipAddress>
      <weight>1</weight>
      <monitorPort>80</monitorPort>
      <port>80</port>
      <maxConn>0</maxConn>
      <minConn>0</minConn>
      <condition>enabled</condition>
      <name>member-one</name>
    </member>
    <member>
      <memberId>member-2</memberId>
      <ipAddress>192.168.0.2</ipAddress>
      <weight>1</weight>
      <monitorPort>80</monitorPort>
      <port>80</port>
      <maxConn>0</maxConn>
      <minConn>0</minConn>
      <condition>enabled</condition>
      <name>member-two</name>
    </member>
  </pool>
</loadBalancer>

Notice there are multiple member XML nodes, one for each pool member. That makes sense as you would have mor ethan one pool member in a NSX load balancer.

You can delete nodes by converting the XML into an object and using the delete command in Javascript. So something like this:

var xmlObj = new XML(xml);
delete xmlObj.pool.member[0];

So this would delete the first member node and all the child nodes but what happens if you need to delete a specific node, say the 192.168.0.2 pool member, or any member for that matter.

In order to do this, you need to find the index. Note that E4X is zero based, so the first member node is index 0 , the second member node is at index 1 etc..

So you need to find the index number for 192.168.0.2. Here’s a script to do this.

// Convert the XML to a XML document object
var document = XMLManager.fromString(xml);

//Search for member element by tag name
var members = document.getElementsByTagName("member");

// Set a marker so we can break in the loop
var memberFound = false;
// Now iterate using i and starting from 0 (remember E4X is zero based.
for (i = 0; i < members.length; i++){

// Now get all the child nodes for the first member.
var childNodes = members.item(i).getChildNodes();

// Iterate through the child node.
for (j = 0; j < childNodes.length; j++){

// Search for your IP address.
if (childNodes.item(j).textContent == "192.168.0.2"){

// Now take the value of the iterator for the member iteration, not the member nodes.
// In this case, it is 1.

System.log(childNodes.item(j).textContent + " found at index " + i);

// Set you flag as you've found the IP and do not want to iterate further.
memberFound = true;
break;
}
}
if (memberFound) {break;}
}

Now you can delete the member using the iterator value. Note that E4X is zero based, so the member-one node is at index 0, member-two is at index 1 etc..

// Create the xmlObj, although we did set this up above.
var xmlObj = new XML(xml);

// note, you need to have the value for i, which is 1 in this case
delete xmlObj.pool.member[i];

But what happens if you what to append an element with child nodes? Say you want to add this XML to the main xmlObj.

var newMemberXml = "<member>
      <memberId>member-3</memberId>
      <ipAddress>192.168.0.3</ipAddress>
      <weight>1</weight>
      <monitorPort>80</monitorPort>
      <port>80</port>
      <maxConn>0</maxConn>
      <minConn>0</minConn>
      <condition>enabled</condition>
      <name>member-three</name>
    </member>"

We can use the new XMLList() object type. An XML List is a linear sequence of XML nodes.

var xmlNewObj = new XMLList(newMemberXml);

// Create the xmlObj, although we did set this up above.
var xmlObj = new XML(xml);

// create the new xml object you wish to append
var xmlNewObj = new XMLList(newMemberXml);

// Append the xmlNeObj to the xmlObj.pool node
System.log(xmlObj.pool.appendChild(xmlNewObj));

This will add the new member node and its child elements to the main xmlObj.
So using delete and childApend(obj) can get you a long way.

Tip:

I use resource elements to hold XML structure in vRealize Orchestrator. Most structures, say to configure a load balancer or to add a node, have static element nodes.

So in order to change the resource element, you can set placeholders in your XML resource element. For example:

<monitor>
   <monitorId>monitor-1</monitorId>
   <type>http</type>
   <interval>10</interval>
   <timeout>15</timeout>
   <maxRetries>3</maxRetries>
   <method>GET</method>
   <url>{monitor_url}</url>
   <expected>{monitor_expected}</expected>
   <name>http_service_monitor</name>
   <send>{monitor_send}</send>
   <receive>{monitor_receive}</receive>
</monitor>

You can then use the following code to replace the placeholders in the curly brackets with values from vRO attributes or input parameters (addHTTPMonitor is the resource element)

var content = addHTTPMonitor.getContentAsMimeAttachment().content;

var monitorContent = content.replace("{monitor_url}", monitorUrl)
	.replace("{monitor_expected}", monitorExpected)
	.replace("{monitor_send}", monitorSend)
	.replace("{monitor_receive}", monitorReceive)

So once you have your XML structure from the resource element, append this using the childApend(obj) method to add the XML element and node to the main XML structure.